
WEBDAV(Web Distributed Authoring and Versioning) 协议在跨设备存储上非常有用,很多客户端都支持此协议,这是基于 HTTP 协议的一些扩展升级,以此来实现对目录文件实现存储读写。本文主要是记录如何实现一个 WEBDAV 协议服务端,最终你可以利用系统内置的 WEBDAV 协议,或者支持 WEBDAV 协议的客户端软件来将你的服务挂载为一块可用的网络硬盘,也可以在应用程序中进行数据的存取使用。
参考 wiki
关于 webdav 的协议简介及协议细节,在具体协议实现过程中可以查询此文档。
https://zh.wikipedia.org/wiki/%E5%9F%BA%E4%BA%8EWeb%E7%9A%84%E5%88%86%E5%B8%83%E5%BC%8F%E7%BC%96%E5%86%99%E5%92%8C%E7%89%88%E6%9C%AC%E6%8E%A7%E5%88%B6
WEBDAV 协议细则 Web Distributed Authoring and Versioning (WebDAV) Access Control Protocol
http://webdav.org/specs/rfc3744.html
入手
这个文档看起来比较生硬,也很难入手,不知道如何去写,如何去验证协议有效性,同时,我也没有找到合适测试 WEBDAV 协议的工具。
PHP 还有一款 webdav 协议的软件 sabre, 这个 sabre 比较庞大,服务拆分的非常细,入门学习,问题追踪非常困难。
在这里换一种方式去理解去实现,比如先找到一款其他人可用能用的服务端,然后通过客户端去挂载访问,进行简单的目录文件预览、文件读取、文件写入删除等操作,同时呢因为是基于 HTTP 协议的你也很容易通过抓包去了解每一步操作发生了些什么。
这里推荐使用 wireshark 去进行抓包,记得将你服务端部署在其他机器上,方便通过 IP 过滤无效的数据包。
无论通过什么方式,在这里我们大概了解到了,实现 WEBDAV 协议服务端最基础的几个操作就是:
- PUT 创建写入文件
- DELETE 删除文件
- GET 获取文件内容
- PROPFIND 获取文件或目录列表信息
实现了上面的,应该就能实现基本的硬盘挂载了吧,下面开始进行实验。
由于是 HTTP 协议,所以也是基于 web 服务的,不需要我们做过多的其他配置。
新建一个工作目录:
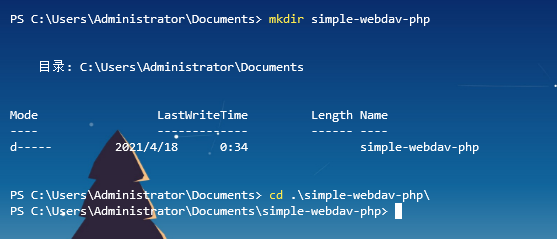
由于 PHP 本身已经具有 HTTP 协议解析服务,在这里我们直接通过 PHP 内置功能创建一个 web 服务:
php -S 0.0.0.0:9999

然后在工作目录中创建 php 文件,就可以通过浏览器访问到。
创建一个 webdav.php 文件,并通过浏览器访问,确保没有问题。


实现基础类
首先实现一个基础的类:
<?php
class dav{

    public function options()
    {

    }

    public function head()
    {

    }

    public function get()
    {

    }

    public function put()
    {

    }

    public function propfind()
    {

    }

    public function delete()
    {

    }
}

$dav = new dav();
$request_method = strtolower($_SERVER['REQUEST_METHOD']);
if (method_exists($dav, $request_method)) {
    $dav->$request_method();
} else {
    // 405 Method Not Allowed
}
当 PHP 接收到请求,会根据具体的请求方法执行到对应的类方法。
根据抓包,我们发现 windows 尝试连接 我们服务时,还会请求一次 options 操作,返回当前服务允许访问的方法:
    public function options()
    {
        header('Allow: OPTIONS, GET, PUT, PROPFIND, PROPPATCH');
        // Allow: OPTIONS, GET, PUT, PROPFIND, PROPPATCH, ACL
        response_http_code(200);
    }
同时,我们还发现 当文件目录不存在时,或者出现错误还会返回一些其他 HTTP 状态码,同时这也是 WEBDAV 服务最基础的一些协商,当资源或请求存在问题时,会返回对应的 HTTP 状态码。
简单实现一下:
function http_code($num)
{
    $http = array(
        100 => "HTTP/1.1 100 Continue",
        101 => "HTTP/1.1 101 Switching Protocols",
        200 => "HTTP/1.1 200 OK",
        201 => "HTTP/1.1 201 Created",
        202 => "HTTP/1.1 202 Accepted",
        203 => "HTTP/1.1 203 Non-Authoritative Information",
        204 => "HTTP/1.1 204 No Content",
        205 => "HTTP/1.1 205 Reset Content",
        206 => "HTTP/1.1 206 Partial Content",
        207 => "HTTP/1.1 207 Multi-Status",
        300 => "HTTP/1.1 300 Multiple Choices",
        301 => "HTTP/1.1 301 Moved Permanently",
        302 => "HTTP/1.1 302 Found",
        303 => "HTTP/1.1 303 See Other",
        304 => "HTTP/1.1 304 Not Modified",
        305 => "HTTP/1.1 305 Use Proxy",
        307 => "HTTP/1.1 307 Temporary Redirect",
        400 => "HTTP/1.1 400 Bad Request",
        401 => "HTTP/1.1 401 Unauthorized",
        402 => "HTTP/1.1 402 Payment Required",
        403 => "HTTP/1.1 403 Forbidden",
        404 => "HTTP/1.1 404 Not Found",
        405 => "HTTP/1.1 405 Method Not Allowed",
        406 => "HTTP/1.1 406 Not Acceptable",
        407 => "HTTP/1.1 407 Proxy Authentication Required",
        408 => "HTTP/1.1 408 Request Time-out",
        409 => "HTTP/1.1 409 Conflict",
        410 => "HTTP/1.1 410 Gone",
        411 => "HTTP/1.1 411 Length Required",
        412 => "HTTP/1.1 412 Precondition Failed",
        413 => "HTTP/1.1 413 Request Entity Too Large",
        414 => "HTTP/1.1 414 Request-URI Too Large",
        415 => "HTTP/1.1 415 Unsupported Media Type",
        416 => "HTTP/1.1 416 Requested range not satisfiable",
        417 => "HTTP/1.1 417 Expectation Failed",
        500 => "HTTP/1.1 500 Internal Server Error",
        501 => "HTTP/1.1 501 Not Implemented",
        502 => "HTTP/1.1 502 Bad Gateway",
        503 => "HTTP/1.1 503 Service Unavailable",
        504 => "HTTP/1.1 504 Gateway Time-out"
    );
    return $http[$num];
}

function response_http_code($num)
{
    header(http_code($num));
}
并将入口处,加入 405 状态码响应:
$dav = new dav();
$request_method = strtolower($_SERVER['REQUEST_METHOD']);
if (method_exists($dav, $request_method)) {
    $dav->$request_method();
} else {
    // 405 Method Not Allowed
    response_http_code(405);
}
新增一个构造方法,并将我们的存储目录设为 public:
    protected  $public;

    public function __construct()
    {
        $this->public = __DIR__.'/public';
    }

PROPFIND 实现目录文件列表
PROPFIND 方法一般返回的文件属性详情,同时也可以返回目录的文件列表及目录本身的属性。
rfc3744 中的请求体和响应内容参考:
http://webdav.org/specs/rfc3744.html#n-example--retrieving-dav-owne
>> Request <<

PROPFIND /papers/ HTTP/1.1
Host: www.example.com
Content-type: text/xml; charset="utf-8"
Content-Length: xxx
Depth: 0
Authorization: Digest username="jim",
  realm="[email protected]", nonce="...",
  uri="/papers/", response="...", opaque="..."

<?xml version="1.0" encoding="utf-8" ?>
<D:propfind xmlns:D="DAV:">
  <D:prop>
    <D:owner/>
  </D:prop>
</D:propfind>

>> Response <<

HTTP/1.1 207 Multi-Status
Content-Type: text/xml; charset="utf-8"
Content-Length: xxx

<?xml version="1.0" encoding="utf-8" ?>
<D:multistatus xmlns:D="DAV:">
  <D:response>
    <D:href>http://www.example.com/papers/</D:href>
    <D:propstat>
      <D:prop>
        <D:owner>
          <D:href>http://www.example.com/acl/users/gstein</D:href>
        </D:owner>
      </D:prop>
      <D:status>HTTP/1.1 200 OK</D:status>
    </D:propstat>
  </D:response>
</D:multistatus>
我们接下来实现这个请求方法的返回内容就行了。
WEBDAV 协议传输数据都是通过 XML 数据返回,我从其他 WEBDAV 服务中复制了一份 PROPFIND 返回的内容,大概类似这样子的:
<?xml version="1.0" encoding="utf-8"?>
<D:multistatus xmlns:D="DAV:">
  <D:response>
    <D:href>/dav/</D:href>
    <D:propstat>
      <D:prop>
        <D:supportedlock>
          <D:lockentry>
            <D:lockscope>
              <D:exclusive/>
            </D:lockscope>
            <D:locktype>
              <D:write/>
            </D:locktype>
          </D:lockentry>
        </D:supportedlock>
        <D:resourcetype>
          <D:collection></D:collection>
        </D:resourcetype>
        <D:getlastmodified>Sun, 11 Apr 2021 16:23:30 GMT</D:getlastmodified>
        <D:displayname/>
      </D:prop>
      <D:status>HTTP/1.1 200 OK</D:status>
    </D:propstat>
  </D:response>
  <D:response>
    <D:href>/dav/%E6%96%B0%E5%BB%BA%E6%96%87%E6%9C%AC%E6%96%87%E6%A1%A3.txt</D:href>
    <D:propstat>
      <D:prop>
        <D:supportedlock>
          <D:lockentry>
            <D:lockscope>
              <D:exclusive/>
            </D:lockscope>
            <D:locktype>
              <D:write/>
            </D:locktype>
          </D:lockentry>
        </D:supportedlock>
        <D:resourcetype/>
        <D:getcontentlength>0</D:getcontentlength>
        <D:getetag>"167508a952fb5c180"</D:getetag>
        <D:getcontenttype/>
        <D:displayname/>
        <D:getlastmodified>Mon, 12 Apr 2021 06:32:44 GMT</D:getlastmodified>
      </D:prop>
      <D:status>HTTP/1.1 200 OK</D:status>
    </D:propstat>
  </D:response>
</D:multistatus>
通过查看已有的返回内容,这个返回内容中只有一个文件,并且还包含了目录本身的属性信息。
那么我们也按照其规律将目录的本身和目录下的文件一并返回。
首先创建一个简单的 文件 XML 信息构建函数,为了方便我们直接通过变量替换,不用 XML 对象去做。
function response_basedir($dir, $lastmod, $status)
{
    $lastmod = gmdate("D, d M Y H:i:s", $lastmod)." GMT";
    $fmt = <<<EOF
<d:response>
        <d:href>{$dir}</d:href>
        <d:propstat>
            <d:prop>
                <d:getlastmodified>{$lastmod}</d:getlastmodified>
                <d:resourcetype>
                    <d:collection/>
                </d:resourcetype>
            </d:prop>
            <d:status>{$status}</d:status>
        </d:propstat>
    </d:response>
EOF;
    // /dav/
    //Sun, 11 Apr 2021 16:23:30 GMT
    // HTTP/1.1 200 OK

    return $fmt;
}

function response_dir($dir, $lastmod, $status)
{
    $lastmod = gmdate("D, d M Y H:i:s", $lastmod)." GMT";
    $fmt = <<<EOF
  <D:response>
    <D:href>{$dir}</D:href>
    <D:propstat>
      <D:prop>
        <D:resourcetype>
          <D:collection></D:collection>
        </D:resourcetype>
        <D:getlastmodified>{$lastmod}</D:getlastmodified>
        <D:displayname/>
      </D:prop>
      <D:status>{$status}</D:status>
    </D:propstat>
  </D:response>
EOF;
    // /dav/
    //Sun, 11 Apr 2021 16:23:30 GMT
    // HTTP/1.1 200 OK

    return $fmt;
}

function response_file($file_path, $lastmod, $file_length, $status)
{
    $lastmod = gmdate("D, d M Y H:i:s", $lastmod)." GMT";
    $tag = md5($lastmod.$file_path);
    $fmt = <<<EOF
  <D:response>
    <D:href>{$file_path}</D:href>
    <D:propstat>
      <D:prop>
        <D:resourcetype/>
        <D:getcontentlength>{$file_length}</D:getcontentlength>
        <D:getetag>"{$tag}"</D:getetag>
        <D:getcontenttype/>
        <D:displayname/>
        <D:getlastmodified>{$lastmod}</D:getlastmodified>
      </D:prop>
      <D:status>{$status}</D:status>
    </D:propstat>
  </D:response>
EOF;
    // /dav/%E6%96%B0%E5%BB%BA%E6%96%87%E6%9C%AC%E6%96%87%E6%A1%A3.txt
    // 0
    // HTTP/1.1 200 OK
    // Mon, 12 Apr 2021 06:32:44 GMT
    return $fmt;

}

function response($text)
{
    return <<<EOF
<?xml version="1.0" encoding="utf-8"?>
<D:multistatus xmlns:D="DAV:">
  {$text}
</D:multistatus>
EOF;
}
注意这里的时间,为了标准化,我转换成了 GMT 格式,tag 简单用 md5 取修改时间和路径名得出。
除了目录 XML 外,额外添加了个 response_basedir 用于返回本级目录信息的 XML 内容,这和子目录略不一样。
为了知道请求时的参数,我们将 PROPFIND 方法暂时修改为输出 $_SERVER 的内容,方便提取自己想要的数据。
    public function propfind()
    {
        var_dump($_SERVER);
        die;
    }
通过 POSTMAN 请求接口,我们可以看到如下的数据:

array(23) {
["DOCUMENT_ROOT"]=>
string(50) "C:\Users\Administrator\Documents\simple-webdav-php"
["REMOTE_ADDR"]=>
string(9) "127.0.0.1"
["REMOTE_PORT"]=>
string(4) "8673"
["SERVER_SOFTWARE"]=>
string(29) "PHP 7.4.16 Development Server"
["SERVER_PROTOCOL"]=>
string(8) "HTTP/1.1"
["SERVER_NAME"]=>
string(7) "0.0.0.0"
["SERVER_PORT"]=>
string(4) "9999"
["REQUEST_URI"]=>
string(12) "/webdav.php/"
["REQUEST_METHOD"]=>
string(8) "PROPFIND"
["SCRIPT_NAME"]=>
string(11) "/webdav.php"
["SCRIPT_FILENAME"]=>
string(61) "C:\Users\Administrator\Documents\simple-webdav-php\webdav.php"
["PATH_INFO"]=>
string(1) "/"
["PHP_SELF"]=>
string(12) "/webdav.php/"
["HTTP_USER_AGENT"]=>
string(21) "PostmanRuntime/7.26.8"
["HTTP_ACCEPT"]=>
string(3) "*/*"
["HTTP_POSTMAN_TOKEN"]=>
string(36) "e4809ebd-013a-41a7-885f-28828990ee10"
["HTTP_HOST"]=>
string(14) "127.0.0.1:9999"
["HTTP_ACCEPT_ENCODING"]=>
string(17) "gzip, deflate, br"
["HTTP_CONNECTION"]=>
string(10) "keep-alive"
["CONTENT_LENGTH"]=>
string(1) "0"
["HTTP_CONTENT_LENGTH"]=>
string(1) "0"
["REQUEST_TIME_FLOAT"]=>
float(1618726819.9309)
["REQUEST_TIME"]=>
int(1618726819)
}
构想一下,webdav.php 为我们的服务器文件,那么请求地址应该是 http://127.0.0.1:9999/webdav.php
列出根目录的请求就应该是: PROPFIND http://127.0.0.1:9999/webdav.php
列出 mobile 的请求就应该是: PROPFIND http://127.0.0.1:9999/webdav.php/mobile
查看 mobile 目录下 test.txt 的请求应该是: GET http://127.0.0.1:9999/webdav.php/mobile/test.txt
参考上面 $_SERVER 返回的内容,我们可以通过 $_SERVER['PATH_INFO'] 拿到自己想要的目标文件相对路径,由于我们将 public 作为 webdav 服务的根目录,那么可以写出如下的代码:
    public function propfind()
    {
        $path = $this->public.'/'.ltrim($_SERVER['PATH_INFO'] ?? '','/');
        $dav_base_dir = $_SERVER['SCRIPT_NAME']. '/'.ltrim($_SERVER['PATH_INFO'] ?? '','/');

        $files = scandir($path);

        $response_text = response_basedir($dav_base_dir,filemtime($path),http_code(200));
        foreach ($files as $file){
            if($file == '.' || $file == '..'){
                continue;
            }
            $file_path  = $path.'/'.$file;
            $mtime = filemtime($file_path);

            if(is_dir($file_path)){
                $response_text.= response_dir($dav_base_dir.'/'.$file,$mtime,http_code(200));
            }elseif(is_file($file_path)){
                $response_text.= response_file($dav_base_dir.'/'.$file, $mtime,filesize($file_path),http_code(200));
            }
        }
        response_http_code(207);
        header('Content-Type: text/xml; charset=utf-8');
        echo response($response_text);
    }
给 public 目录创建一个文件,我们再通过 POSTMAN 请求接口:
<?xml version="1.0" encoding="utf-8"?>
<D:multistatus xmlns:D="DAV:">
    <D:response>
        <D:href>/webdav.php/</D:href>
        <D:propstat>
            <D:prop>
                <D:resourcetype>
                    <D:collection></D:collection>
                </D:resourcetype>
                <D:getlastmodified>Sun, 18 Apr 2021 06:31:01 GMT</D:getlastmodified>
                <D:displayname/>
            </D:prop>
            <D:status>HTTP/1.1 200 OK</D:status>
        </D:propstat>
    </D:response>
    <D:response>
        <D:href>/webdav.php//新建文本文档.txt</D:href>
        <D:propstat>
            <D:prop>
                <D:resourcetype/>
                <D:getcontentlength>0</D:getcontentlength>
                <D:getetag>"018ef2aa2b63d83e6b1c6f2ff90fb792"</D:getetag>
                <D:getcontenttype/>
                <D:displayname/>
                <D:getlastmodified>Sun, 18 Apr 2021 06:31:01 GMT</D:getlastmodified>
            </D:prop>
            <D:status>HTTP/1.1 200 OK</D:status>
        </D:propstat>
    </D:response>
</D:multistatus>
看样子已经可以了。
尝试将这个地址挂载到 windows10 的系统中访问,http://127.0.0.1:9999/webdav.php
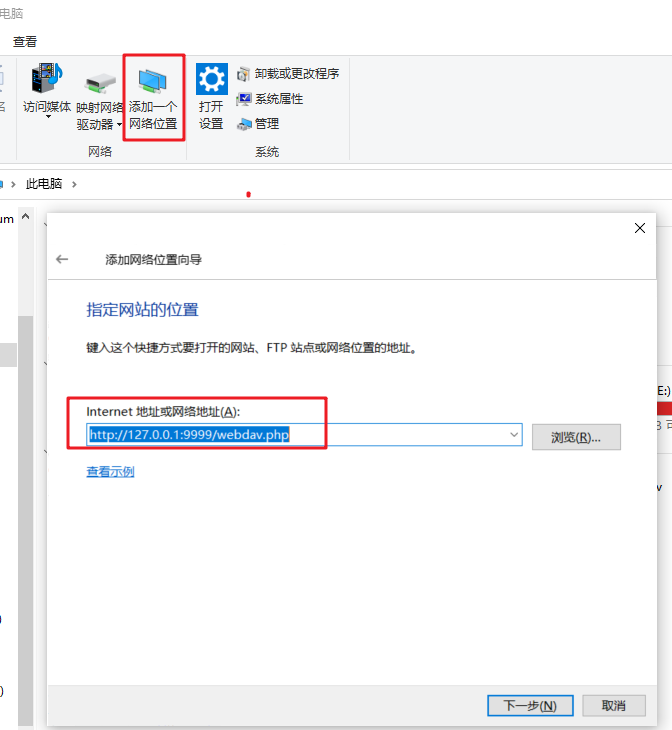
但很不幸失败了:

为了查清楚发生了什么,我们将请求日志记录一下。
$dav = new dav();
$request_method = strtolower($_SERVER['REQUEST_METHOD']);
$header_text = "";
foreach (getallheaders() as $name => $value) {
    $header_text.="$name: $value\n";
}
$input = file_get_contents("php://input");
file_put_contents('./HEAD.log', $request_method.' '.$_SERVER['REQUEST_URI'].PHP_EOL.$header_text. PHP_EOL.$input.PHP_EOL,FILE_APPEND);
if (method_exists($dav, $request_method)) {
    $dav->$request_method();
} else {
    // 405 Method Not Allowed
    response_http_code(405);
}
再尝试点击 下一步 ,打开产生的日志。
options /webdav.php
Connection: Keep-Alive
User-Agent: Microsoft-WebDAV-MiniRedir/10.0.19042
translate: f
Host: 127.0.0.1:9999


propfind /webdav.php
Connection: Keep-Alive
User-Agent: Microsoft-WebDAV-MiniRedir/10.0.19042
Depth: 0
translate: f
Content-Length: 0
Host: 127.0.0.1:9999


propfind /webdav.php
Connection: Keep-Alive
User-Agent: Microsoft-WebDAV-MiniRedir/10.0.19042
Depth: 0
translate: f
Content-Length: 0
Host: 127.0.0.1:9999
经过对比测试,发现 Depth: 0 时,只需要返回目录本身属性信息,不需要目录下其他文件。
修改 PROPFIND 方法为:
 public function propfind()
    {
        $path = $this->public.'/'.ltrim($_SERVER['PATH_INFO'] ?? '','/');
        $dav_base_dir = $_SERVER['SCRIPT_NAME']. '/'.ltrim($_SERVER['PATH_INFO'] ?? '','/');

        if(isset($_SERVER['HTTP_DEPTH'])){
            if($_SERVER['HTTP_DEPTH'] == 0){
                if(is_file($path)){
                    $response_text = response_file($dav_base_dir,filemtime($path),filesize($path),http_code(200));
                }elseif(is_dir($path)){
                    $response_text = response_basedir($dav_base_dir,filemtime($path),http_code(200));
                }else{
                    response_http_code(404);
                    return;
                }
                response_http_code(207);
                header('Content-Type: text/xml; charset=utf-8');
                echo response($response_text);
                exit;
            }
        }

        $files = scandir($path);

        $response_text = response_basedir($dav_base_dir,filemtime($path),http_code(200));
        foreach ($files as $file){
            if($file == '.' || $file == '..'){
                continue;
            }
            $file_path  = $path.'/'.$file;
            $mtime = filemtime($file_path);

            if(is_dir($file_path)){
                $response_text.= response_dir($dav_base_dir.'/'.$file,$mtime,http_code(200));
            }elseif(is_file($file_path)){
                $response_text.= response_file($dav_base_dir.'/'.$file, $mtime,filesize($file_path),http_code(200));
            }
        }
        response_http_code(207);
        header('Content-Type: text/xml; charset=utf-8');
        echo response($response_text);
    }
再次点击 下一步 按钮,发现已经成功了。
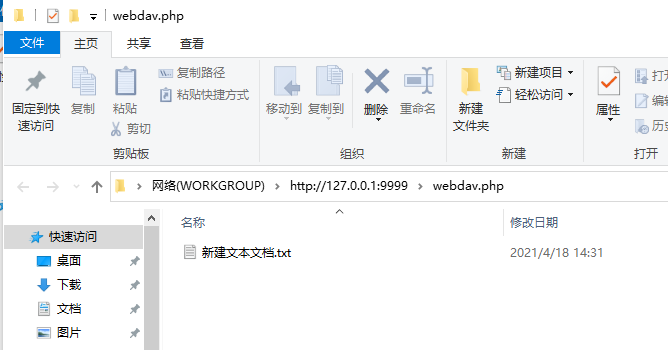
GET 实现获取文件信息
GET 直接将对应的资源内容返回就行了,不需要做处理。
    public function get()
    {
        header('Content-Type: application/octet-stream');
        $path = $this->public.'/'.ltrim($_SERVER['PATH_INFO'],'/');
        if(is_file($path)){
            $fh = fopen($path,'r');
            $oh = fopen('php://output','w');
            stream_copy_to_stream($fh, $oh);
            fclose($fh);
            fclose($oh);
        }else{
            response_http_code(404);
        }
    }
PUT 实现创建写入文件内容
    public function put()
    {
        $input = fopen("php://input",'r');
        try{
            $path = $this->public.'/'.ltrim($_SERVER['PATH_INFO'],'/');
            $fh = fopen($path,'w');
            stream_copy_to_stream($input, $fh);
            fclose($fh);

        }catch (Throwable $throwable){
            response_http_code(503);
            echo $throwable->getMessage();
        }
    }
HEAD 方法返回文件大小时间信息
    public function head()
    {
        header('Content-Type: application/octet-stream');

        $path = $this->public.'/'.ltrim($_SERVER['PATH_INFO'],'/');
        if(is_file($path)){
            header('Content-Length: '.filesize($path));
            $lastmod = filemtime($path);
            $lastmod = gmdate("D, d M Y H:i:s", $lastmod)." GMT";
            header('Last-Modified: '.$lastmod);
        }else{
            response_http_code(404);
        }
    }
DELETE 对文件资源进行删除
    public function delete()
    {
        header('Content-Type: application/octet-stream');
        $path = $this->public.'/'.ltrim($_SERVER['PATH_INFO'],'/');
        if($path){
            if(unlink($path)){
                response_http_code(200);
            }else{
                response_http_code(503);
            }
        }else{
            response_http_code(404);
        }
    }
MKCOL 创建目录
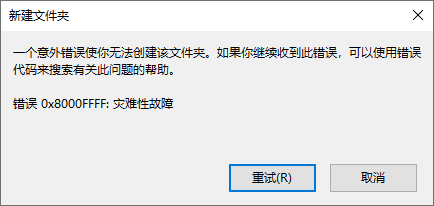
当发现目录无法创建,通过提取创建目录时的请求信息用于参考:
propfind /webdav.php/%E6%96%B0%E5%BB%BA%E6%96%87%E4%BB%B6%E5%A4%B9
Connection: Keep-Alive
User-Agent: Microsoft-WebDAV-MiniRedir/10.0.19042
Depth: 0
translate: f
Content-Length: 0
Host: 127.0.0.1:9999


mkcol /webdav.php/%E6%96%B0%E5%BB%BA%E6%96%87%E4%BB%B6%E5%A4%B9
Connection: Keep-Alive
User-Agent: Microsoft-WebDAV-MiniRedir/10.0.19042
translate: f
Content-Length: 0
Host: 127.0.0.1:9999
MOVE 文件或目录更名
请求日志参考:
move /webdav.php/%E6%96%B0%E5%BB%BA%E6%96%87%E4%BB%B6%E5%A4%B9
Connection: Keep-Alive
User-Agent: Microsoft-WebDAV-MiniRedir/10.0.19042
Destination: http://127.0.0.1:9999/webdav.php/dffds
Overwrite: F
translate: f
Content-Length: 0
Host: 127.0.0.1:9999
PROPPATCH 方法设置资源属性
当我们实现了基本的操作方法后,发现我们刚才新建的文本内容并不能进行保存。
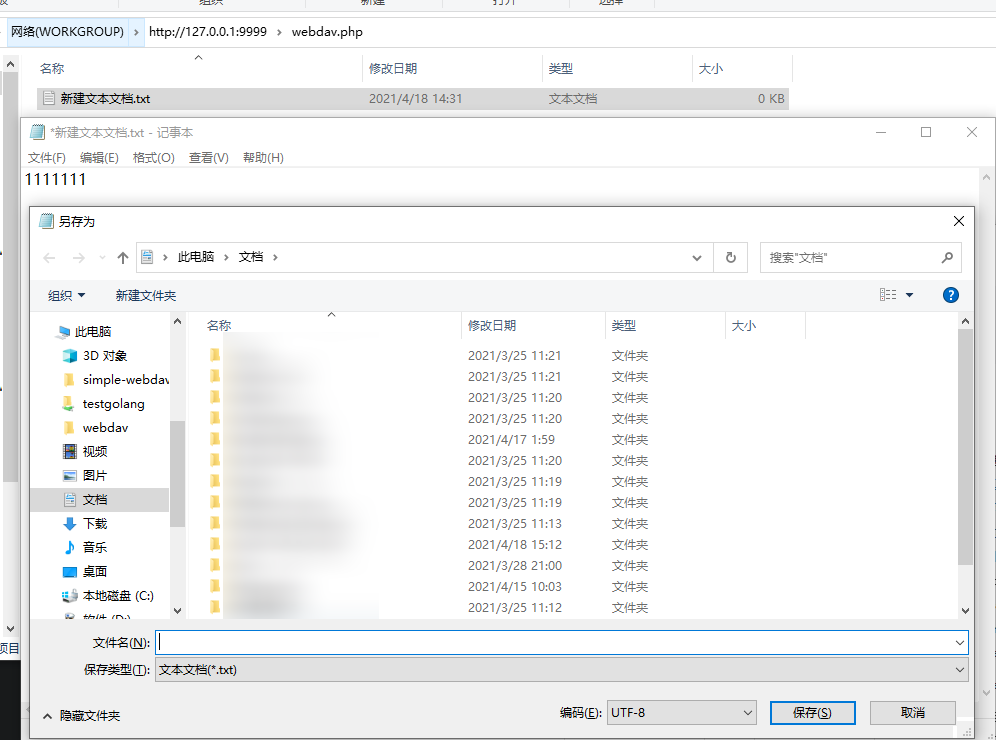
通过查看日志,我们发现这里有一个 LOCK 操作:
lock /webdav.php/%E6%96%B0%E5%BB%BA%E6%96%87%E6%9C%AC%E6%96%87%E6%A1%A3.txt
Cache-Control: no-cache
Connection: Keep-Alive
Pragma: no-cache
Content-Type: text/xml; charset="utf-8"
User-Agent: Microsoft-WebDAV-MiniRedir/10.0.19042
translate: f
Timeout: Second-3600
Content-Length: 220
Host: 127.0.0.1:9999

<?xml version="1.0" encoding="utf-8" ?><D:lockinfo xmlns:D="DAV:"><D:lockscope><D:exclusive/></D:lockscope><D:locktype><D:write/></D:locktype><D:owner><D:href>DESKTOP-WHOAMI\Administrator</D:href></D:owner></D:lockinfo>
propfind /webdav.php
Connection: Keep-Alive
User-Agent: Microsoft-WebDAV-MiniRedir/10.0.19042
Depth: 1
translate: f
Content-Length: 0
Host: 127.0.0.1:9999


propfind /webdav.php
Connection: Keep-Alive
User-Agent: Microsoft-WebDAV-MiniRedir/10.0.19042
Depth: 0
translate: f
Content-Length: 0
Host: 127.0.0.1:9999
我们将添加一个 LOCK 方法,不去实现它,但需要正确返回:
    public function lock()
    {
        response_http_code(501);
    }
当再次尝试,就可以进行保存了。
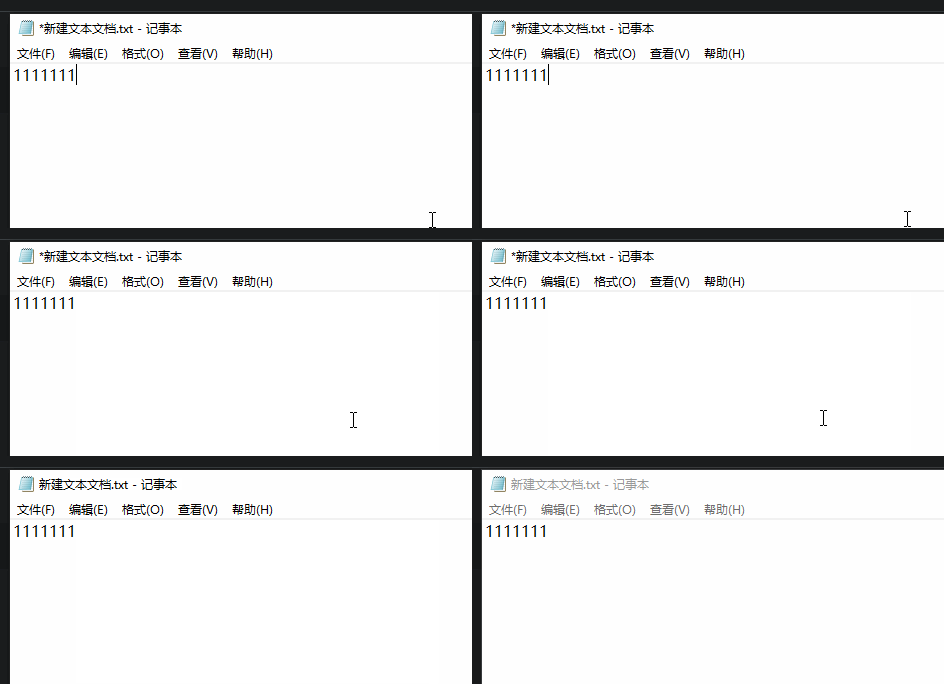
此时新建操作可以进行使用了,但当外部的文件复制进来时,会提示无法读源文件或磁盘。
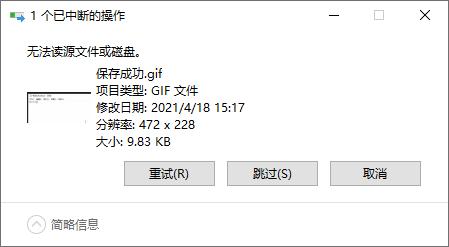
原因时缺失 PROPPATCH 方法,无法对资源进行属性设置。可以参考 rfc3744 进行响应体构造 http://webdav.org/specs/rfc3744.html#n-example--an-attempt-to-set-dav-owner
这里我们简单返回 403 禁止的内容:
public function proppatch()
{
    $path = $this->public . '/' . ltrim($_SERVER['PATH_INFO'], '/');
    echo <<<EOF
<?xml version="1.0" encoding="utf-8" ?>
<D:multistatus xmlns:D="DAV:">
<D:response>
<D:href>{$path}</D:href>
<D:propstat>
  <D:prop><D:owner/></D:prop>
  <D:status>HTTP/1.1 403 Forbidden</D:status>
  <D:responsedescription>
    <D:error><D:cannot-modify-protected-property/></D:error>
    Failure to set protected property (DAV:owner)
  </D:responsedescription>
</D:propstat>
</D:response>
</D:multistatus>
EOF;

    response_http_code(207);
}
再次从外部拖放文件到 webdav 网络盘中,此时一切正常。

结束
基本到此就结束了,通过 PHP 实现了 WEBDAV 服务端一些基本的功能,也记录了一些抓包和问题排查方法,你可以通过此为基础,参考 rfc3744 将该代码完善起来使用。
但是 PHP 还存在一个问题就是,当触发 PUT 方法请求到 PHP 服务器时,PHP 默认会将所有文件数据存储到内存当中去,之后才会执行脚本,这就导致上传的文件必须小于服务器运行内存,WEBDAV 协议本身我也没有找到关于文件分块的内容,总之这点弊端很严重,对于小内存机器就很难进行大文件传输。
关于上文的所有代码放在了这里,如果有需要可以参考:https://github.com/ellermister/simple-webdav-php


Comments